

Trade shows in Vancouver move fast. You’re juggling booth setup, staff schedules, product samples, lead capture, and last-minute surprises. And if you’ve ever done an event at the Vancouver Convention Centre, you already know the truth:
Even strong brands can look unprepared if the booth setup is messy.
This checklist is designed to help you show up looking organized, professional, and “expensive,” even if your booth is small. It covers what to bring, what to print, how to prepare, and the common mistakes that make booths look cheap.
If you’re preparing for a Vancouver event and want a booth setup that looks clean, premium, and professional, explore our Custom Booths service and get a complete booth kit designed for your space.
Use it as a full preparation guide for:
- trade shows and expos
- conferences and corporate events
- festivals and pop-up booths
- product launches and brand activations in Vancouver
1. Pre-Event Planning Checklist (Before You Print Anything)
Before you order booth graphics, you need clarity. This step is the difference between a booth that looks coordinated and a booth that feels random.
Confirm these details first:
- Booth size: 10×10, 10×20, or custom size
- Booth type: inline / corner / island
- Table provided: 6ft or 8ft
- Tablecloth allowed? (some events have restrictions)
- Back wall allowed? (height limits are common)
- Electricity access (yes/no, where outlet is)
- Lighting included or not
- Wi-Fi available (trade show Wi-Fi is often unreliable)
- Setup time window and loading rules
- Parking/loading rules (especially downtown Vancouver venues)
Set a clear goal for the booth:
Be honest: your booth can’t be everything.
Pick one main goal:
- book appointments
- collect leads
- sell on-site
- drive brand awareness
- launch a product
- recruit staff
Your goal changes what you print and what you bring.
2. Branding & Design Prep (The Part Most People Rush)
Your booth visuals need to be consistent across every item.
If your banner looks one way, your tablecloth looks another way, and your flyers use different fonts, your booth will feel low-quality even if every item was printed perfectly.
Quick design prep checklist:
- Use one primary logo version
- Use one brand font style
- Use one color palette (2 to 4 main colors)
- Use consistent messaging (one tagline, not five)
- Use high resolution files (vector is best)
If you’re a new business and don’t have branding, you can still look professional. But you must keep everything clean and consistent.
3. The Core “Must-Have” Booth Print Checklist (Non-Negotiable)
These are the print items that give your booth structure. Without them, the booth will look empty.
A) Booth backdrop / wall graphic
This is your foundation. It sets the tone instantly.
Options that work well:
- fabric backdrop
- pop-up wall
- modular booth back wall
- retractable banner wall setup
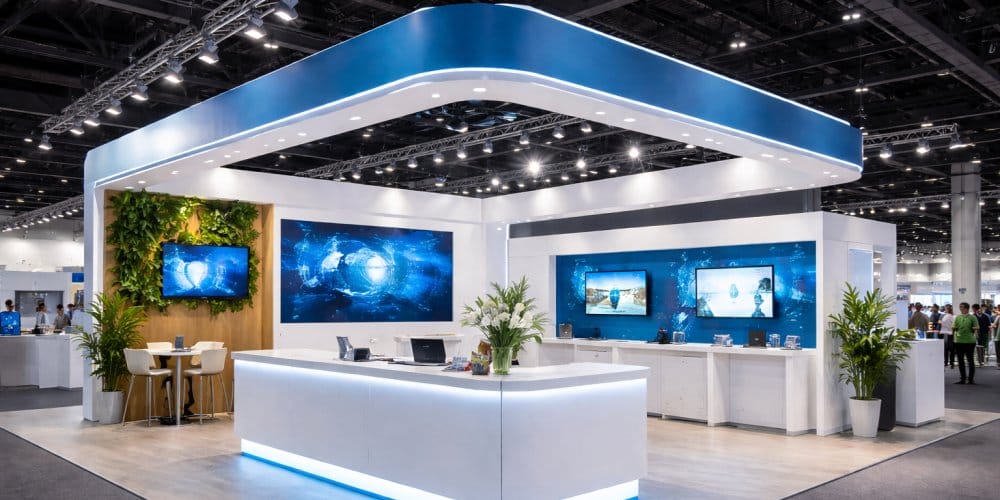
- SEG style backlit displays (premium)
Even in a 10×10 booth, having a strong back wall makes you look established.
Need a high-impact booth wall that photographs well? Our Backlit Backdrops are ideal for exhibitions and conferences in Vancouver.
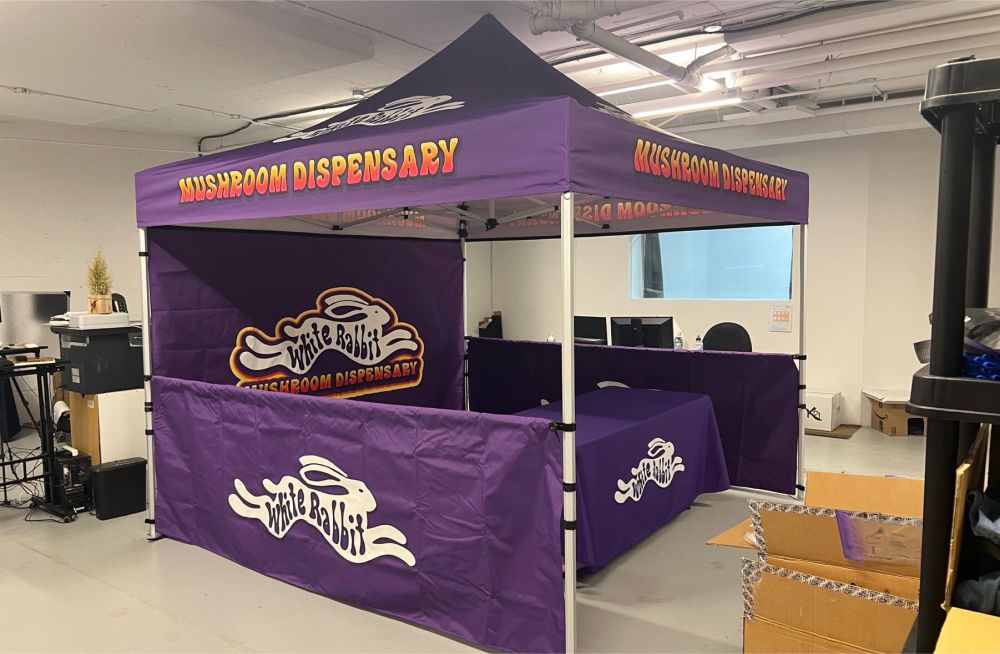
B) Branded table cover (tablecloth)
If your table is visible, your tablecloth matters. Tables without clean branding feel like a random vendor table.
Most professional setups include:
- a fitted tablecloth or throw table cover
- logo placed cleanly (not oversized)
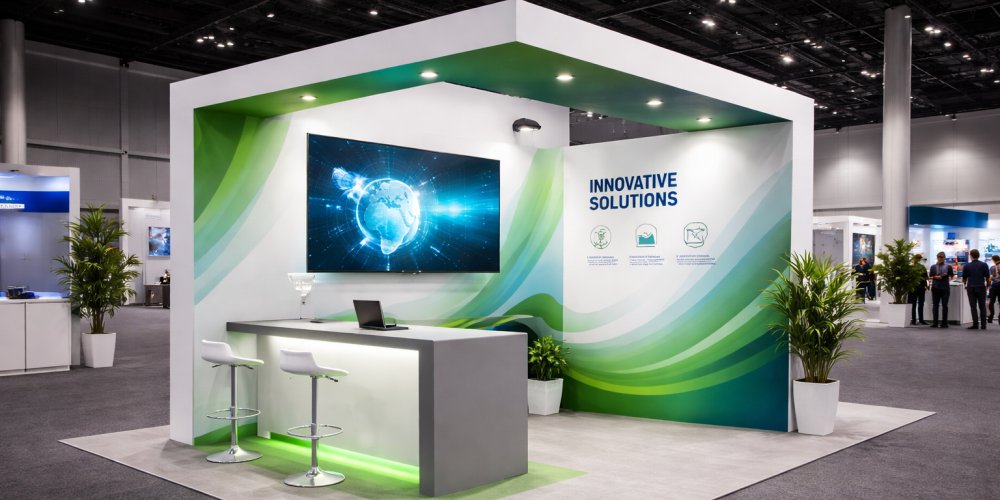
C) A clear “What we do” sign
This is the most overlooked item.
Your logo isn’t enough.
People walking by should understand what you offer in 3 seconds.
A good booth message looks like:
- “Same-Day Custom Printing”
- “Trade Show Displays & Branding”
- “Custom Apparel for Teams & Events”
- “Web Design + SEO for Vancouver Businesses”
This can be printed on:
- backdrop
- roll-up banner
- signboard
- counter display
D) Printed handouts (at least one)
Even if you prefer digital, you should have something physical:
- flyers
- brochures
- postcards
- promo cards
Why? Because trade shows are noisy. People forget. A handout keeps you in their bag.
A branded table cover is one of the fastest upgrades you can make, see our Custom Tablecloth Printing in Vancouver options for trade show-ready materials and sizing.
4. Optional Print Items That Make Your Booth Look “Premium”
If you want your booth to feel like a real brand experience, these are the upgrade items that make a big difference.
A) Counter display or podium wrap
If you have a branded counter or podium, people interact with your booth more naturally. It becomes a “front desk” instead of just a table.
B) Floor decals or directional signs
Floor decals work extremely well at busy Vancouver expos.
They guide foot traffic and pull people in.
Example uses:
- arrows to your booth
- short CTA like “Scan for free sample”
- product highlight messages
C) Menu-style sign / pricing board
If you sell products or packages, hiding pricing creates friction.
A clean printed pricing board:
- builds trust
- reduces awkward conversations
- attracts serious buyers
D) Hanging signs (for larger booths)
If you’re in 10×20 or larger, overhead signage helps people find you in crowded halls.
5. The Booth Equipment Checklist (What to Bring)
Print isn’t the whole booth. Your setup tools matter just as much.
Essentials:
- extension cords (heavy duty)
- power bar
- gaffer tape (strong, clean removal)
- scissors + cutter
- zip ties
- binder clips
- measuring tape
- stapler
- Sharpies + pens
- small toolkit
- alcohol wipes (for surfaces)
- microfiber cloth
Lighting tools:
- portable LED lights (huge upgrade)
- clamp lights
- spare batteries / chargers
Setup tools:
- step stool (for backdrops)
- gloves (protect graphics)
- cleaning spray
This is what separates smooth setups from stressful setups.
6. Lead Capture Checklist (How to Get Leads Without Looking Desperate)
A booth without lead capture is just an expensive brand display.
Choose ONE lead system:
- QR code form (fast)
- business card drop (simple)
- tablet sign-up (professional)
- short printed form (last resort)
For Vancouver events, QR + tablet sign-up works best.
What makes people actually sign up:
Offer something real:
- discount for orders placed within 7 days
- free consultation
- free sample
- free branded mockup
- giveaway entry
Print these lead items:
- QR code sign (tabletop)
- “Offer” sign explaining why to scan
- small cards with QR code (easy to carry)
Your team should not force people to scan. The booth should make it obvious and natural.
To convert more booth visitors into leads, add a simple QR code card or sign and drive people to your Quote Request page.
7. Staff Uniform Checklist (Simple but Powerful)
When staff look like a team, the booth instantly feels professional.
At minimum:
- matching t-shirts or polos
- consistent color theme
Bonus:
- name tags
- branded lanyards
It’s not just for looks. It helps visitors know who to talk to.
8. Product Display Checklist (How to Look Organized)
Trade show booths fail when products are placed randomly.
Use display structure:
- 1 main hero product
- 2 to 4 supporting items
- clean spacing
- clear labels
Display tools:
- acrylic sign holders
- small shelves or risers
- tabletop stands
- sample binders
If you offer services (not products), your display becomes:
- before/after visuals
- portfolio samples
- printed case studies
- testimonials
9. Digital Assets Checklist (Do This Even If You Print Everything)
You want your booth visitors to:
- remember you
- contact you
- follow you
Make sure you have:
- landing page ready (event-specific is best)
- QR codes tested (don’t assume they work)
- social handles consistent
- Google Maps listing easy to find
- appointment booking ready (if needed)
QR code tip:
Do not link QR codes to your homepage unless the homepage is built for conversion.
Better:
- a dedicated event landing page
- a “Get Quote” form
- a free sample sign-up
10. Packing Checklist (This Prevents Disaster)
Many booths fail before the event starts, just due to missing items.
Packing categories:
- Print materials (banners, tablecloth, signs)
- Setup tools (tape, cords, tools)
- Staff items (uniforms, lanyards, name tags)
- Lead materials (QR signs, tablets, cards)
- Samples/products
- Personal items (water, snacks, painkillers)
Print items should be packed like this:
- banners in tubes
- tablecloths in garment bags
- signs wrapped in bubble wrap
- spare adhesives and hooks included
If you can’t set up smoothly in 60–90 minutes, your packing isn’t organized.
11. Setup Day Checklist (So You Don’t Look Rushed)
Trade show setup is not the time for improvisation.
A good setup sequence:
- Lay flooring or base mats (if any)
- Build backdrop wall
- Add lighting
- Place table + tablecloth
- Add signage
- Add samples/product display
- Set up lead capture station
- Clean surfaces and do final alignment
Final “booth polish” checklist:
- remove wrinkles (steam if needed)
- wipe surfaces
- hide cables
- align everything
- remove extra boxes from view
The last 10 minutes of polish can change how premium your booth feels.
12. The “Looks Cheap” Mistake Checklist (Avoid These)
If you want to stand out at Vancouver trade shows, avoid the common mistakes that instantly make booths look cheap:
- blurry banners (low resolution)
- too much text on banners
- random fonts across prints
- wrinkled tablecloth
- clutter visible under table
- messy cables everywhere
- staff wearing random outfits
- weak lighting (dark booth)
- no clear message for passersby
Your booth should feel simple:
- clean message
- clean visuals
- clear offer
- consistent branding
That’s what creates trust.
Final Checklist Summary
If you want a quick summary you can use as your final pre-event list:
Must-print items:
- booth backdrop / banner
- tablecloth
- “what we do” sign
- handouts (flyers/brochures)
- QR code sign
Must-bring equipment:
- extension cord + power bar
- gaffer tape + zip ties
- tools (scissors, cutter, markers)
- lighting (portable LED)
- cleaning wipes + cloth
Must-plan:
- booth goal + CTA
- lead capture method
- event landing page or form
- setup timeline + team roles
Trade shows are expensive. In Vancouver, booth competition is real. But you don’t need the biggest booth to win.
You need the most prepared booth.
When your setup is clean, consistent, and visually strong, people assume you’re a high-quality business. And that changes how they approach you, how they remember you, and how likely they are to become a customer.
If you want a complete booth setup with matching graphics, signage, and branded display prints, our Custom Booths team in Vancouver can help you plan everything from backdrop to table coverage.
If you want a booth that looks premium and professional, focus on:
- a strong backdrop
- branded table coverage
- clear signage
- proper lighting
- smart lead capture
That is the formula that makes booths work, even in crowded Vancouver events.